Aquatic Pets
How to Start a Freshwater Aquarium Tank for Beginners Properly
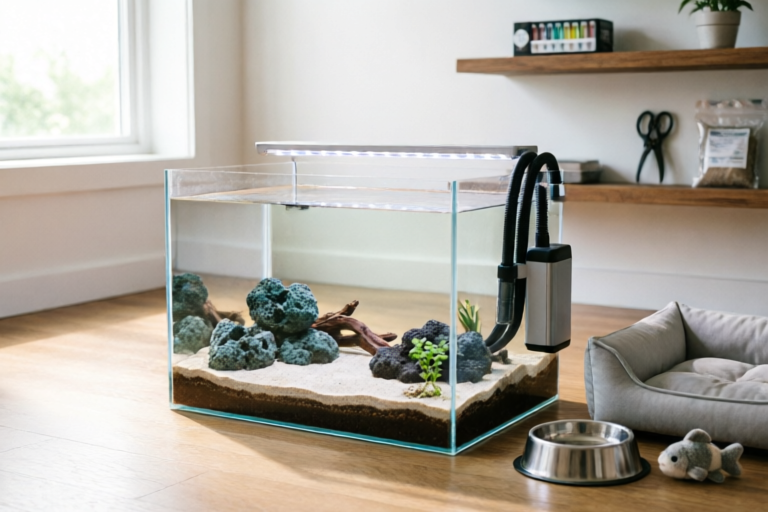
Create Your Own Underwater World
# How to Start a Freshwater Aquarium Tank for Beginners Properly
## Introduction: Why Start a Freshwater Aquarium?
The world of home aquatics is vast, captivating, and endlessly rewarding. Starting a freshwater aquarium is more than just buying a glass box filled with water; it is the beginning of a journey into biology, ecology, and artistic design. Whether you are looking to add a focal point to your living room, reduce stress through observation, or learn about complex biological systems, an aquarium offers unique benefits. However, for beginners, the process can seem overwhelming due to the sheer volume of terminology and equipment available.
### The Benefits of Keeping Fish
Keeping a freshwater tank brings a multitude of benefits. Scientifically, studies have shown that watching fish swim can lower blood pressure and reduce anxiety. The rhythmic movement of plants and fish creates a meditative state, offering a digital detox and a moment of calm in a busy life. Furthermore, for parents, an aquarium serves as an educational tool, teaching children responsibility, patience, and respect for living creatures. It transforms the mundane into a vibrant ecosystem where you witness life cycles firsthand.
### Setting Realistic Expectations
Before diving in, it is crucial to manage expectations. A common misconception is that an aquarium is a low-maintenance hobby. In reality, consistency is key. A successful tank requires regular attention, testing, and upkeep. Fish are live animals that depend entirely on their environment for survival. Mistakes can happen, such as incorrect water parameters or overfeeding, which can lead to illness or death. By understanding that a tank is a closed system that mimics nature, you prepare yourself for the responsibilities ahead. Success comes from patience, education, and observation rather than immediate perfection.
## Gathering Essential Equipment and Supplies
Success begins before you even open a package. The right foundation ensures stability and minimizes future headaches. You cannot simply buy a tank and fill it with tap water; specific tools are necessary to maintain a viable habitat.
### Choosing the Right Stand and Tank
The most important physical component is the stand and the aquarium itself. Water is heavy. One gallon weighs approximately 8.3 pounds. A 55-gallon tank, a popular beginner size, will hold about 450 pounds of water alone, not including the weight of the glass, gravel, rocks, and equipment. Therefore, investing in a sturdy, level stand designed specifically for the tank size is non-negotiable. Using a kitchen cabinet or makeshift furniture poses a severe safety risk.
For beginners, glass tanks are generally recommended over acrylic. While acrylic is lighter and less prone to cracking under impact, glass is scratch-resistant and easier to clean without damaging clarity. Rectangular tanks are also preferred over hexagonal ones because corners in smaller tanks create blind spots for cleaning and can harbor debris. Aim for a minimum of 20 gallons (75 liters) to start. Smaller bowls fluctuate in temperature and water chemistry rapidly, making it extremely difficult for fish to survive.
### Filtration Systems
Filtration is the heart of any aquarium. A good filtration system performs three functions: mechanical (removing debris), chemical (absorbing impurities via carbon), and biological (housing beneficial bacteria). As a beginner, a Hang-On-Back (HOB) filter or an internal sponge filter is ideal. HOB filters are versatile, easy to access for cleaning, and efficient for most community tanks. Sponge filters are quieter and excellent for fry protection but may require more frequent maintenance in heavily stocked tanks.
Avoid buying filters marketed solely on aesthetic appeal. Look for models with adjustable flow rates. Some fish, like Betta splendens, dislike strong currents and prefer gentle movement. Always choose a filter rated for slightly more gallons than your actual tank capacity to allow for buffer room.
### Lighting and Heating
Lighting serves two purposes: aesthetics and photosynthesis for live plants. LED lights are the modern standard, offering energy efficiency and longevity compared to old fluorescent bulbs. If you plan to keep live plants, ensure your light fixture provides adequate PAR (Photosynthetically Active Radiation). For fish-only setups, standard white or blue-white LEDs suffice to simulate day and night cycles.
Temperature control is vital for tropical freshwater fish. Most popular species thrive between 75°F and 80°F (24°C - 27°C). You will need a reliable aquarium heater. Match the wattage to the tank size; a general rule is 2.5 to 5 watts per gallon depending on ambient room temperature. Always use a thermometer to monitor the actual temperature, as digital displays on heaters can occasionally be inaccurate. Having a backup heater is also wise for safety.
### Substrate and Decor
Substrate (the bottom layer) affects both aesthetics and health. Gravel allows for better oxygenation of beneficial bacteria colonies and is easy to siphon, while sand looks natural and is preferred by bottom-dwellers like Corydoras catfish, who may injure their bellies on sharp gravel. Choose inert substrates. Avoid crushed corals or shells unless keeping saltwater species or specialized pH-stabilizing setups.
Decoration should be functional. Rocks and driftwood provide hiding spots, reducing stress and aggression among fish. Ensure all decorations are smooth and non-toxic. Never bring found objects from outside the home into the tank without boiling them, as they may harbor parasites or toxins.
### Testing Kits and Tools
Many beginners skip purchasing test kits, believing tap water is good enough. Tap water often contains chlorine, chloramine, and heavy metals harmful to fish. You need a liquid drop test kit for ammonia, nitrite, nitrate, and pH. Strips are cheaper but less accurate. A water conditioner is mandatory to neutralize toxins immediately upon opening a bottle. Finally, acquire a siphon/gravel vacuum for water changes, a bucket dedicated solely to the aquarium (never mix household cleaners with it), and nets for handling fish.
## Preparing the Tank Environment
Once you have gathered your supplies, it is time to assemble. Rushing this stage is the most common error made by new owners. The setup phase determines the baseline stability of your ecosystem.
### Positioning and Leveling
Place your stand in a location away from direct sunlight. Direct sun causes rapid algae blooms, which can starve fish of oxygen and turn the tank green. Avoid placing the tank near drafts, air conditioning vents, or heaters, as these cause temperature fluctuations. Once the stand is secure, place the empty tank on top. Use a leveler or a bubble level to ensure the base is flat. An uneven surface puts immense stress on the glass seams, leading to potential cracks years down the road. Place a foam liner between the stand and the glass if recommended by the manufacturer to prevent hotspots.
### Washing and Setup
It is tempting to wash equipment with soap to remove dust, but NEVER use soap, detergents, or cleaning products in or near the tank. Chemical residues are deadly to aquatic life and beneficial bacteria. Rinse all equipment, gravel, rocks, and glass containers with warm tap water only. Fill your bucket with water to test rinse items.
Add your substrate to the tank. Spread it evenly. To prevent clouding, pour gravel gently against a plate placed on the tank floor while pouring, allowing it to slide slowly into place. Add your driftwood or rocks now, arranging them securely so they do not collapse. Fill the tank with water. Pouring directly onto the substrate will stir up dust. Fill a plastic bag or bowl with water and place it inside the tank, then pour the stream against it to diffuse the flow.
### Conditioning the Water
Fill the tank about halfway first. Install the heater and let it run until the water is stable. Install the filter. Then, add a generous dose of liquid water conditioner to treat the remaining water as you top it off. This neutralizes chlorine instantly. Check the water temperature to ensure it matches the desired tropical range. Leave the filter and heater running continuously. At this stage, do not add fish. You are preparing the stage, but the actors are not yet ready to perform.
## Cycling the Tank Without Fish
This is arguably the most critical step for long-term success. Many beginners rush to buy fish on day one, leading to the dreaded "New Tank Syndrome," where fish die shortly after introduction due to toxic spikes. You must establish the Nitrogen Cycle before adding livestock.
### Understanding the Nitrogen Cycle
Fish waste produces ammonia, which is highly toxic to gills and liver function in aquatic animals. Fortunately, microscopic beneficial bacteria exist that convert this poison into safer substances. This process happens in stages:
1. **Ammonia Oxidation:** Nitrifying bacteria convert ammonia into nitrites. Nitrites are also toxic, preventing red blood cells from carrying oxygen.
2. **Nitrite Oxidation:** A second strain of bacteria converts nitrites into nitrates.
3. **Nitrate Reduction:** Nitrates are relatively non-toxic at low levels but build up over time and must be removed via partial water changes.
In a new tank, there is no established population of these bacteria. Without them, ammonia builds up instantly once you introduce any waste source. This creates a cycle of poisoning that kills fish before the colony establishes.
### Steps for Fishless Cycling
To cycle the tank safely without risking fish lives:
**1. Source of Ammonia:** You need to add ammonia to feed the bacteria. You can do this by adding a small pinch of fish food every few days, or by using pure liquid ammonia from a hardware store (without surfactants). The goal is to create a baseline of about 2-5 ppm ammonia.
**2. Waiting Period:** Allow the tank to run for 2 to 6 weeks. Do not disturb the filter media during this period. You are waiting for the bacteria to colonize the pores of the filter sponge and gravel.
**3. Monitoring Parameters:** Test your water twice a week. You will see ammonia levels rise initially, then eventually crash back down to zero as the first bacteria bloom. Shortly after, nitrites will spike and then drop to zero. Only when both ammonia and nitrite read 0 ppm, and detectable nitrates appear, is your tank fully cycled. This indicates the biological filter is ready to handle the waste of fish.
**4. Seeding:** To speed up the process, consider purchasing bottled beneficial bacteria. These contain concentrated cultures of nitrifying bacteria that can jumpstart the colonization process, potentially saving you several weeks of cycling time. They are a worthwhile investment for impatient beginners.
**5. Verification:** Perform a large water change (25-50%) once the cycle is complete to lower nitrate levels before introducing fish. This resets the baseline for your new aquarium journey.
## Stocking, Maintenance, and Final Thoughts
After the cycling process is verified, you have successfully transformed an empty box into a living ecosystem. Now, it is time to introduce life. This transition requires careful consideration and strict adherence to maintenance schedules.
### Selecting Hardy Starter Fish
Beginners often gravitate toward colorful neon tetras or aggressive cichlids. Neon tetras, however, can be finicky and sensitive to water chemistry fluctuations in poorly settled tanks. Cichlids are territorial and often unsuitable for shared tanks. Instead, select hardy species known for resilience and adaptability.
**Top Recommendations:**
* **Guppies and Platies:** Very hardy, colorful, and breed easily (be prepared for babies!).
* **Corydoras Catfish:** Peaceful bottom dwellers that add activity and help eat leftover food.
* **Betta Fish:** Beautiful solo additions, but remember they need space and warmth; do not house multiple males together.
* **Cherry Barbs:** Hardier versions of neon tetras that tolerate a wider pH range.
Start with a small bioload. Rule of thumb: one inch of fish per gallon is a myth for larger fish, but a good starting point for a community tank is roughly 1 inch of adult fish per 5 gallons of water. Space is the limiting factor, not just volume.
### Establishing Feeding Routines
Starvation is rare in new tanks; overfeeding is the number one killer. Fish operate on instinct and do not stop eating when full. Excess food rots on the bottom, fueling ammonia spikes and bacterial blooms.
Feed your fish twice daily, but only what they can consume within 2 to 3 minutes. Use a variety of high-quality flakes, pellets, or frozen foods. Fasting one day a week is highly beneficial to clear their digestive tracts and reduce waste production. Consistency creates less stress than feast-and-famine cycles. Remove uneaten food quickly to maintain pristine water quality.
### Regular Cleaning Tips
Maintenance does not mean scrubbing everything clean. Partial water changes are the primary maintenance task. Every week, perform a 20% water change. Siphon the gravel to remove fish waste and detritus. Use your gravel vacuum during these changes.
**What Not to Clean Too Often:**
Never replace filter pads completely or scrub the entire interior walls weekly. Beneficial bacteria live on surfaces, especially inside the filter media. Scrubbing kills this colony. Only rinse filter sponges in a bucket of taken-out tank water to preserve the bacteria. Rinse them gently, never tap water, as chlorine will kill the bacteria. Change activated carbon monthly to refresh chemical filtration, but leave biological media untouched.
Glass cleaning should be done as needed. Algae removal is a chore, but it is normal. Use an algae magnet or scraper on the front glass. Avoid chemical algae removers initially; manual scraping is safest and cost-effective. Trim overgrown plants regularly to encourage growth and prevent decay.
### Troubleshooting Common Issues
Cloudy water usually indicates a bacterial bloom, often caused by overcleaning or new tank syndrome. Stop feeding for a day and wait for clarity to return.
Green water is caused by excess light and nutrients (phosphates/nitrates). Reduce lighting hours and perform a water change.
If fish are gasping at the surface, it indicates low oxygen or high ammonia. Immediately test water and perform a partial water change. Increase aeration with an extra air stone if possible.
### Concluding Encouragement
Starting a freshwater aquarium is a testament to dedication and love for nature. There will be challenges. You might lose a plant, or a fish might pass away despite your best efforts. This is part of the learning curve. Treat failures as lessons rather than defeats. Observe your fish, note their behaviors, and adjust your parameters accordingly.
The reward for your effort is an underwater paradise that brightens your room and soothes your mind. Remember the core rule: patience, testing, and consistency. Take it slow, cycle your tank thoroughly, and stock wisely. Before you know it, you will be observing a thriving, balanced ecosystem that you built from scratch. Welcome to the wonderful hobby of aquascaping and fish keeping. Start responsibly, and let the beauty unfold.
## Frequently Asked Questions
**Q: Can I put a betta fish in a small bowl?**
A: Ideally, no. Bettas need heated water and ample swimming space. A bowl lacks filtration and temperature stability. A minimum of 5 gallons is recommended for a betta to thrive.
**Q: How much does it cost to start an aquarium?**
A: Costs vary significantly. A basic 10-20 gallon kit can range from $100 to $300 initially. Long-term costs include electricity, water changes, replacement consumables like filters and food, and new fish. Budget around $30-$50 monthly for ongoing maintenance.
**Q: Should I put live plants in a beginner tank?**
A: Yes. Live plants absorb nitrates, compete with algae, and provide oxygen. Hardy plants like Java Fern, Anubias, and Hornwort grow well with low light and require minimal trimming.
**Q: What if I go on vacation?**
A: Do not rely on "vacation blocks" that last for weeks; they dissolve at inconsistent rates and can pollute the water. Ask a friend to come feed for 3-5 days. Longer absences require automation or a trusted caretaker to perform water changes.
Comments

StartersGuide
this was exactly what i needed before going to the pet store saved me from buying useless decorations totally worth reading
👍 17👎 0

TechTanker
anyone else having trouble getting ammonia levels down fast enough tried using bottled bacteria but its taking way longer than promised
👍 26👎 0

FroggyMom
big shoutout for mentioning water conditioner most blogs forget to warn about chlorine damage my goldfish was sick until i fixed that
👍 8👎 0

BettaBro
did i miss something on the substrate thickness? mine seems too shallow after following your gravel guide lol
👍 1👎 0

AquaticLover12
just got my 10g tank running today! the cycling part is confusing but your steps made it easier to understand hoping to add fish next week
👍 10👎 0