How to Trim Dog Nails Safely at Home Today
Happy Paws, Healthy Steps
How to Trim Dog Nails Safely at Home Today
Every dog owner knows the dread associated with nail maintenance. It is one of those tasks that often gets postponed until a nail breaks or causes visible discomfort. However, keeping your dog’s nails trimmed is not just about cleanliness; it is a critical component of their overall orthopedic health and mobility. Fortunately, you do not need to brave a crowded vet clinic or stress out a professional groomer to get the job done. With the right knowledge, tools, and patience, trimming your dog’s nails safely at home today is entirely achievable.
This comprehensive guide will walk you through everything you need to know about canine nail care. From understanding the anatomy of the paw to managing potential accidents, we will cover every step required to transform nail trimming from a chore into a bonding experience. Let’s dive deep into making your four-legged friend comfortable, healthy, and happy.
1. Understanding the Importance of Regular Nail Care
Why is it so crucial to maintain regular nail care? Many owners underestimate the impact long nails can have on a dog’s skeletal structure and daily life. Unlike humans, whose nails grow flat against the surface, a dog’s weight is distributed across their toes, meaning overgrown nails fundamentally alter their biomechanics.
The Risks of Overgrown Nails
When dog nails are allowed to grow too long, they curl back towards the paw pad. This unnatural pressure can cause several health complications:
- Postural Issues: Long nails push the digits backward, forcing the carpal joints (wrists) and elbow joints to compensate. Over time, this misalignment leads to chronic joint stress, arthritis, and permanent musculoskeletal damage.
- Pain and Discomfort: As nails extend, they dig into the paw pads. Dogs may develop calluses or painful splits where the nail has curled completely around the toe.
- Safety Hazards: Extremely long nails are prone to snagging on carpet fibers, rugs, or grass. When a nail catches and is pulled, it can tear the nail bed violently, resulting in bleeding and infection.
- Bacterial Growth: Nails that drag on the ground collect dirt, bacteria, and moisture between the toe beans, creating a breeding ground for infections like pododermatitis.
Benefits of Short, Well-Maintained Nails
Conversely, maintaining short nails ensures optimal health and comfort:
- Natural Gait: Your dog will walk with their weight correctly distributed on their pads rather than their claws, leading to smoother movement.
- Improved Traction: Short nails allow for secure footing on smooth surfaces like hardwood floors, reducing the risk of slipping and injury.
- All-Around Comfort: A dog with trimmed nails does not experience the constant pressure on sensitive nerve endings in the toe, allowing for better sleep and activity levels.
2. Preparation and Essential Tool Selection
Successful nail trimming starts long before the clippers touch the nail. The preparation phase sets the stage for safety and success. Rushing this step is a common reason why beginners struggle.
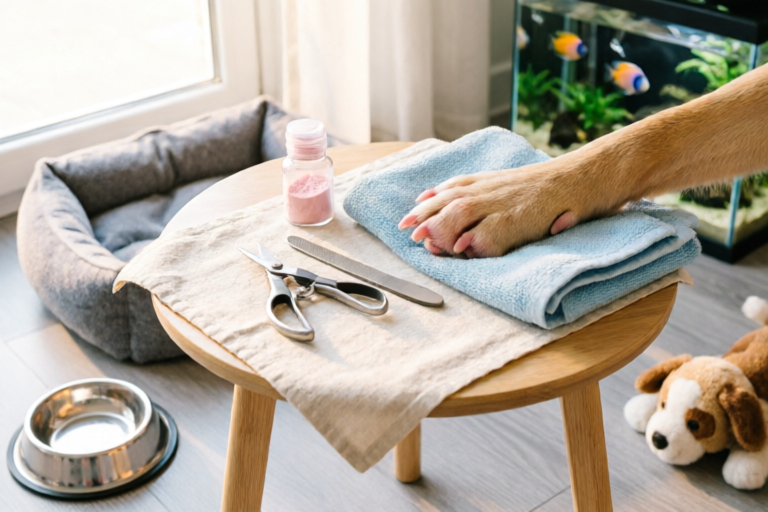
Gathering the Necessary Equipment
Having the right tools makes the process significantly smoother. Here is what you should prepare:
- Dog Nail Clippers: There are three main types:
- Guillotine Style: Best for small dogs. A hole holds the nail, and a blade pushes through to cut. Good for precision.
- Scissor Style: Resembles scissors, ideal for large breeds with thick nails. Provides good leverage.
- Pliers/Grinder Type: Electric grinders file the nail down gradually. These minimize the risk of cutting the quick but can vibrate loudly, which might scare some dogs.
- Styptic Powder: This is non-negotiable. If you accidentally cut the "quick" (the sensitive blood vessel inside the nail), styptic powder will help stop the bleeding immediately and numb the area.
- High-Value Treats: Select something your dog loves exclusively for this activity. Peanut butter (xylitol-free), cheese, or boiled chicken work wonders.
- Towels or Non-Slip Mat: Place a rubber mat or towel on the floor so your dog’s paws don’t slide. Sliding increases anxiety because the dog feels insecure.
- Good Lighting: You need a bright lamp or well-lit room to distinguish the different layers of the nail.
Crafting a Calm Environment
Your dog reads your energy. If you are tense or anxious about trimming their nails, they will become fearful. Choose a time when your dog is naturally relaxed, such as after a long walk or exercise session. They will be tired and less likely to resist.
Designate a specific corner of the house as the “grooming station.” Avoid doing this on a high counter where your dog feels unstable. Sitting on the floor is often better, as it brings you to their level. Eliminate distractions like TV noise or other pets wandering by. Focus solely on the interaction between you and your dog to build trust.
3. Step-by-Step Guide to Safe Trimming
Now comes the core of the process. This section requires patience. Do not attempt to trim all nails in one sitting if your dog gets stressed. Break it up into sessions if necessary.
Identifying the Quick
The “quick” is the sensitive part of the nail containing blood vessels and nerves. Cutting into the quick is painful and causes bleeding. Knowing where it is located is the most critical skill in this guide.
- White or Light-Colored Nails: This is easier. Hold the nail up to a light source. You will see a pinkish line running inside the nail. This is the quick. Leave a few millimeters of space (about 1-2mm) between the cut mark and the pink area.
- Black or Dark Nails: This presents a challenge as you cannot see the quick. Look at the underside of the nail. As you shave tiny pieces off, the cross-section will change. Initially, it looks opaque and gray-white. As you approach the quick, it turns darker and becomes more pinkish-gray or black. Once you see a chalky or black center appearing, stop immediately.
Correct Paw Handling Technique
Approach your dog calmly. Ask them to sit. Lift one paw gently. Use your thumb underneath the paw pad to extend the nail, while using your index finger to stabilize the toe.
If your dog is nervous, hold their head gently with your chin against their chest. This provides reassurance without being a restraint technique that triggers fear.
Executing the Cut
Position the clippers perpendicular to the nail shaft, not parallel. Angle the cut at roughly 45 degrees, following the natural shape of the toe.
- Test Cut: Make a small, cautious cut first.
- Check Shape: Look at the cut surface. If it looks white and shiny, you are still safe. If there is a soft gray dot, you are nearing the quick.
- Repeat: Move to the next nail. Take small nips. Do not try to snap off a large chunk of the nail in one motion.
- Dry Run: For the last nail, do not clip. Just grind or file lightly to smooth any rough edges.
What Not to Do
Avoid cutting the bottom of the nail straight across like scissors cutting paper. This leaves a sharp edge that can catch on things. Instead, round off the tip gently. Also, never pull the nail away from the foot while clamping; let the nail stay in place to prevent tearing.
4. Handling Accidents and Managing Anxiety
Even with the best preparation, accidents happen. Additionally, some dogs are naturally fearful of grooming. Here is how to handle both scenarios effectively.
Immediate Solutions for Bleeding Incidents
If you accidentally cut the quick, stay calm. Your dog will look to you for cues. Panicking signals danger to your pet.
- Apply Immediate Pressure: Dip the bleeding end of the nail into styptic powder or press a saltwater solution onto the wound. Apply firm pressure with a clean cloth for 30 seconds.
- Monitor: Once the bleeding stops, inspect the area. If swelling continues or discharge appears later, contact your vet.
- Stop Trimming: End the session immediately. Do not try to rush and finish the rest of the paws while the dog is still upset.
Strategies to Reduce Stress
If your dog becomes fearful, whining, or tries to bite, you need a behavior modification strategy. Forceful restraint will increase their trauma and create negative associations.
- The Desensitization Method: Spend days just touching the paws and giving treats without clipping. Touch the nail clipper near the paw, give a treat. Progress to holding the clipper near the nail, then touching the clipper to the nail. Eventually, make a clipping motion in the air. Only move to actual clipping once they are fully comfortable with each previous step.
- Body Language Awareness: Watch for yawning, lip licking, whale eye (showing whites of eyes), or pinned ears. These are signs of stress. If you see them, take a break immediately.
- Use Distractions: While trimming, allow the dog to lick a peanut butter-filled Kong toy. This focuses their brain on eating rather than feeling restrained.
5. Building a Lasting Grooming Routine
Trimming nails once is not enough; it is a lifelong maintenance issue. Establishing a routine prevents the overgrowth cycle and reduces stress long-term.
Rewarding Positive Behavior
Positive reinforcement is key. After each successful trim (even just one nail), lavish your dog with praise and a high-value treat. Create a ritual: Clip → Treat → Play. Over time, the smell of the clippers will signal fun time rather than punishment.
Establishing Frequency
There is no universal rule, but generally:
- Active Outdoors Dogs: Walking on concrete wears nails down naturally. You may only need to trim monthly.
- Indoor Dogs: Dogs that spend most time indoors will need trimming every two weeks.
- Sound Check: Listen for clicking sounds when your dog walks on the floor. If you hear clicks, their nails are too long.
Knowing When Professional Help Is Needed
While home grooming is excellent, there are times when you should seek assistance:
- Extreme Aggression: If your dog consistently snaps or bites despite positive reinforcement attempts, a professional groomer may have specialized equipment or techniques.
- Tumors or Deformities: If the nail bed looks swollen or abnormal, a vet needs to examine it before clipping.
- Owner Physical Limitations: Large, strong dogs may require physical strength beyond your capability.
Conclusion
Trimming your dog’s nails is an act of love. By prioritizing their health and comfort, you are preventing future injuries and ensuring they remain mobile and active companions. Remember, consistency beats perfection. Start slow, be gentle, and celebrate every small victory with your furry friend.
FAQ: Common Questions About Nail Care
Q: How often should I trim my puppy’s nails?
A: Puppy nails grow quickly. Start trimming them weekly from a young age to accustom them to the sensation. Keep it very brief initially.
Q: Can I human nail clippers for my dog?
A: Generally, no. Human clippers are designed for thin fingernails and can crush a dog’s thicker nails instead of cutting them cleanly. Invest in the right tool.
Q: What if my dog has dewclaws?
A: Dewclaws do not touch the ground, so they never wear down. They are prone to catching and tearing. Be sure to trim these specifically, as they grow much longer faster than the others.
With these guidelines, you are now equipped to perform safe, effective nail trims. Take a deep breath, gather your treats, and enjoy spending quality time caring for your best friend.
Comments

grinder vs clippers? honestly my cheap clippers slipped twice. bought the quiet ones and it helps anxiety.

if they fight back stop! dont force it. brought ours to a vet once and we learned the proper grip. totally worth the cost.

how long between trims for medium size dogs? seems like every 3 weeks for us now.

had an accident first time 🩸 didnt panic thanks to the tip about styptic powder though! good read honestly.

does anyone else struggle seeing the quick on dark claws? mine are almost black so i'm scared to go too deep.
finally tried this weekend!! the grinder option you suggested was a lifesaver. my pup was shaking but it ended up going smooth.